Sunday, August 14, 2011

Photopolymer Gravure Workshop with Don Messec

Elk Lake, New Year's Day 2011
Paul Romaniuk
Photopolymer gravure print

How do I judge whether a workshop I've just taken was successful? By the level of fatigue I feel the day after it ends. If I've become totally engrossed and engaged in the process being taught, I find I barely sleep for the entire length of the workshop because I'm over-stimulated (occupational hazard of the introvert). It's the day after a 5 day workshop with Don Messec on photopolymer gravure that was held at Lúz Gallery and I'm totally wiped. It was just that outstanding!

Tanya's plate on the press, ready for printing

Don is gregarious, opinionated, sharp-witted, extremely knowledgeable and simply an excellent teacher. He has done extensive research into methods of printmaking from the position of always questioning whether there is a safer and better way to make prints. His research into gravure printing has resulted in a  safe process using photopolymer "solarplates" (that are developed in water and are non-toxic) and soy-based Akua intaglio inks. Don's process results in prints that exceed the quality achieved with traditional gravure methods that involve working with extremely hazardous chemicals and toxic ink formulations. So not just safer, but better prints as well.

Some of the plates from the workshop

I knew right from the start that this was going to be a great learning experience. Don began by telling us that he was definitely going to teach us how to make photopolymer gravure prints, but his top priority was to give us the information and teach us the skills to get the process up and running in our own studios with our own equipment.

In a nutshell, the process involves printing a positive image on a transparency using an inkjet printer, and then laying that transparency on top of a photopolymer plate to expose it to UV light, which hardens the emulsion on the plate according to how much light each area receives as it passes through the image on the transparency. Success relies on two key aspects: knowing what the optimal exposure time is, and knowing how to adjust the image before printing the transparency to hold detail in the shadows on the exposed photopolymer plate. It would have been far easier for Don to do all the pre-testing of the equipment to determine optimal exposure time and tonal adjustments the day before the workshop, so he could just "dial us in". Everyone would have immediately begun making good prints using the parameters he had pre-determined, but we would have been completely clueless how to accomplish that same level of achievement once the workshop was over and we were in our own studios.

Instead we worked as a group to make the test plates that were used to determine the optimal exposure time with the simple UV unit on hand, and then followed that with the necessary testing to determine how much to adjust the black point of the digital image to get a full tonal range on the final print. Don involved us all in the analysis of the test prints and explained the criteria that he uses to determine the optimal exposure and black point adjustment. It helped clarify the process for all of us.

Heather and Lynda inking plates, Tanya at the press

Would you agree to teach a course on stripping down and reassembling a diesel engine to a group of people who ranged from those who barely knew how to start their cars to others who had designed engines for decades? Pretty daunting task isn't it, not something most people would contemplate. Then add in the ringer that you aren't teaching this class in your well equipped shop, nor in some other garage, but in a pizza parlour with a good set of wrenches. It takes a special person to pull that off (and a good set of wrenches).

That's close to what Don agreed to do - come from his world class studio in Santa Fe to teach photopolymer gravure in Victoria, except not at an another artist's printmaking studio, but in an art gallery. The gallery is owned by Diana Millar and Quinton Gordon who together have a passion for building local capacity for making fine prints by a variety of methods - inkjet printing, traditional darkroom work, such "alt" processes as platinum/palladium printing, and also photogravure. The owners in question had a "good set of wrenches" - an etching press donated by a local artist, a space that could be dedicated for a week to the purpose of giving the workshop, and a ton of expertise in photo editing and printing with computers and high quality printers. Don drove up from Santa Fe carrying whatever else he could think would be needed to give the workshop.


The people taking the workshop were pretty evenly split between those who had never made an etching or other printmaking-type print in their lives, to several artists who had significant printmaking experience. Add in the differences in the level of expertise with editing images on a computer (as one student announced at the start of the class "I almost blew up my computer putting my images on that thing-a-majig" aka usb stick drive), and perhaps you can appreciate why I think Don was incredibly brave to take on the task of teaching this workshop. 

Everyone went away with successful plates and prints, which is a testament to how effective Don is as a teacher, and how successful Quinton and Diana are at finding and attracting outstanding instructors, and how resourceful they all are at doing whatever is necessary to make a workshop like this succeed. For example, I know that Quinton arranged this workshop in part because he wants to be able to add photopolymer gravure printing to his personal artistic practice. However, when it became apparent that several participants would need expert assistance with image preparation, he took off his student's hat and gladly took on the role of expert image editor which basically occupied him for the entire workshop. In addition, several of the more experienced printmakers in the group helped out less experienced students with their inking, plate wiping and printing questions when Don was busy helping other students expose and process plates.

Heather pulls a gorgeous print off the press

Well - sounds like everything went swimmingly, doesn't it? Yes, yes it did although by a very circuitous route through initial failure and intensive problem solving. We were using 8"x10" solarplates with a simple gravity contact method - place solarplate face up, place transparency face down, cover with 1/2" plate glass and expose. The first couple of plates made gave very promising prints which were a bit dark but otherwise had good tonal range and outstanding line detail. Then an interesting problem arose - images with larger areas of light grey tones showed "measles" - random, small darker toned circles within the large grey area. In printmaking, large "flat" areas of light tones are always a technical challenge, regardless of whether printing by screen, litho plate or etching plate.

Well, as strange as it seems, this turned out to be one of the most effective learning opportunities we could have hoped for. Being a teacher myself, it was a privilege to watch the way Don got everyone involved in discussing and testing possible solutions to this problem. I think a large part of the "buy in" by the group was the atmosphere in the workshop - there was lots of lively discussion, witty repartee, back and forth teasing between Don and the students that was both entertaining and conducive to a relaxed environment. It took a day and a half and some late night testing by Don, but the problem was solved - the gravity system we were using wasn't giving complete contact between the transparency and the solarplate, leading to random differences in exposure in the large areas of flat tones. The solution was simple - just use plates smaller than 8x10, since the gravity frame provided good contact at smaller sizes. At that point everyone's work took off. More importantly we had all learned a great deal about the process and how to troubleshoot it if the need should arise in our own studios.

Just two of the many luscious prints pulled by other students in the workshop

Once this problem was solved, the plates were coming out of the processing room at a steady rate, and beautiful prints were flying off the press. In his own studio workshops, Don has students use a vacuum frame to ensure perfect contact between transparency and print. Quinton had been searching for a vacuum frame for some time, and fortuitously on the last full day of printing, he got a lead on one locally. He took Don with him to evaluate it, and with a little TLC Lúz Gallery will have it up and running shortly. As the workshop came to an end, I think we had every surface in the space buried under plates and prints. Diana and Quinton have learned that printmakers are like an insidious fungus that rapidly grows to cover all available surfaces.

I'm sure other students in the class will share their prints on their own websites or blogs. As for my own experience - absolutely sublime. I came with a range of images to test the process with, and have a valuable resource of prints to work from in my further experiments with this medium:


Saturday, August 6, 2011

Lauren Henkin Workshop on Marketing

Today I attended a workshop on a topic that until recently I never imagined I would ever sign up for - marketing for artists. I will confess up front that as an extreme introvert, the idea of meeting strangers, particularly with a request such as asking for a portfolio review, amps up the sweaty palms and nervous ticks. Even the idea of joining a group of strangers in a workshop environment can be a challenge for me. While my basic personality hasn't changed, what changed is my realization that if I want something like our nascent publishing idea Studio Centralé to get off the ground, marketing is something that I need to learn about. And fortunately an opportunity presented itself to me with Lauren Henkin's workshop at Lúz Gallery, a venue that I'm familiar with (they consistently host great workshops) where I have come to know Diana and Quinton, who own the gallery.

Well, as has often been the case in the past in this charmed life of mine, the decision to take this particular workshop on marketing for artists was precisely the right thing at the right time. Lauren is an extremely knowledgeable, energetic, open person who quickly engages the entire group in the enterprise of learning about marketing. As a photographer and self-published author (her handmade artist books are exquisite), Lauren has directly experienced and dealt with the challenges facing the participants, which makes her a very relevant and effective leader for this kind of workshop. The group itself consisted of 15 people with an extremely broad range of backgrounds, interests and experience which is a testament to the high quality of the Lúz workshops - they attract a great cross section of people. And that in turn enriches the learning environment, since so many different points of view are expressed during discussions.

Early on, Lauren recounted an anecdote that explained her approach to teaching. It involved a math teacher who taught her how generally to construct theorems rather than memorize specific ones. As she recounted, this vastly opened up her understanding of mathematics. The story resonated with me because I had a similar experience - I slogged through organic chemistry as an undergraduate, robotically memorizing all the different functional groups and the reactions they could participate in. Then when I was a graduate student a chemistry prof taught a course that focused on reactive species (there are only a few main ones) and how to recognize which is likely to form under any given conditions - that greatly simplified and expanded my understanding of organic chemistry. I base my own teaching philosophy on that experience, trying to instil in my biochemistry students an understanding of the general applicability of underlying concepts, which in turn allows them to see relationships and applications in unexpected contexts. So I felt an immediate connection to Lauren's method of teaching.

In the case of the workshop today, Lauren's goal was to get us to think of how to approach marketing in a more general, broadly applicable sense rather than in a rote, rule-bound or stepwise approach limited by conventional thinking about photography markets. She accomplished this with a combination of a well designed, comprehensive handout, specific discussion of some key aspects of marketing and case studies that clearly demonstrated how what seems like a "round about" approach is often much more effective than a direct approach.

Lauren shared an anecdote that illustrated how an initial meeting with a person who wasn't a gallerist (but who liked her work) and who couldn't ostensibly directly help her resulted in an introduction to a gallerist, an impromptu show after pitching the idea of a book opening to that gallerist, which in turn lead to establishing a relationship with a collector. Does it seem convoluted? Perhaps. Does it seem unpredictable? Absolutely. Yet when Craig Semetko talked at Lúz Gallery two weeks ago, he told a similar story that wound its way from an initial meeting with a gallerist in Colorado, to a two person show with Henri Cartier Bresson, to travelling shows at Leica galleries in the US and Europe, to an introduction to one of the premier photobook publishers in Europe. In both Lauren's and Craig's stories, one important characteristic was their persistent work at keeping in touch with people and following up all opportunities that arose from that.

What I particularly appreciated about Lauren's fresh take on marketing was its very basic underlying principle - that a gallerist/publisher is first and foremost a human being and should be treated respectfully. In Lauren's case, she has approached such people with an offer to voluntarily lead a critique group, or to give an artist talk, to go to lunch after an initial introduction; in other words, to simply establish a relationship with the person in question without requests for a portfolio review or a studio visit. And to do that sincerely with the intent to get to know this person better and to become a contributing member of the local arts community. This idea was a very welcome one to me, the introvert. I'm only going to be comfortable trying to ask someone to look at my work or consider carrying my books in their gallery or shop if I have been able to get to know them.

Another important aspect of the workshop was navigating the question of "when are you ready for the next step", be it going to a portfolio review, approaching a gallery, self-publishing a book. Here Lauren's advice was to keep in touch with other artists, give careful consideration to your work and the feedback it receives (both positive and negative); to ask for the guidance/advice/critique of a few people whose work and opinions you respect. This idea was encapsulated very succinctly and effectively by the educator Sir Ken Robinson in a TED presentation, and in his book The Element, in what he refers to as finding your "tribe" - that is a group of people who share your passion. These are the people who can share your experience and who can hopefully be open and honest critics of each others work. While I've been part of tribes who shared my passion for printmaking and for painting, I need to establish a good group to work with in photography and book making/publishing.

This summary really only touches on a few of the highlights of a very excellent workshop. Lauren is wonderful at connecting with each person in a group, listening to their needs and concerns and responding in a helpful and supportive way. If you have an opportunity to take a workshop with Lauren, I'd highly recommend that you do.

Friday, August 5, 2011

Weekend Wet Plate Adventures

 In the garden

Last weekend I started on my solo wet plate collodion adventure. The day before the weekend arrived, I received a package in the mail from Niles Lund containing my silver bath, developer trays and modified film holders. I was excited about getting started, and in anticipation of getting these final items, I had mixed a batch of salted collodion the day before. It was still quite cloudy, so I also mixed a small batch of a "quick clear" collodion recipe that I found on-line. 

Before I could get started, I needed to source some glass plates and black trophy aluminum. A friend of mine owns a framing store, and I stopped in to ask if they would cut some 4"X5" glass plates for me. He was happy to do so (at no charge!), which pleased me no end since I was assured of having something to work with. I next went to a local trophy store - the people there were very nice and helpful, and I ordered plates in 3.5" X 4.5", 4" X 5" and 7.5" X 9.5" to fit my various holders. No problem, and they would be ready in 30 minutes. That was a pleasant surprise - I was expecting the usual "two to three business days". When I returned the plates were ready, but came with a shocker of a sticker price! At $0.30 per square inch, my order was over $200 before taxes (each 4"x5" plate was $6, each 7.5"X9.5" plate was $20!). Pleased to have material to work with, but resolved to finding a less expensive source in the future. It's good though to know that there is a local source that can help out in a pinch.

Later in the afternoon, I picked up the glass plates that my friend's assistant had cut, and lovingly interleaved with mat board off cuts - 20 sheets to play with! The euphoria lasted until I arrived home to discover that all the plates were larger than 4"x5" by 1/8" in one or both dimensions and wouldn't fit into the holder. Lesson learned - take the holder with me when I want glass plates cut so that the requirements are fully understood. I'll have to individually grind each plate down before I can use them. Still, they were free and a kind gesture from a friend.

Another problem I'll have to deal with is pouring, sensitizing and developing plates. Collodion is a mixture of volatile, highly flammable solvents. Since my darkroom is in the basement of the house, which also has gas furnace and hot water tank, pouring the plates in the house is just not going to work. In addition, my wife is extremely sensitive to odours (which can trigger horrible migraine headaches). I plan to build a dark box to do the plate pouring and processing outside in the garden. For this weekend, I was able to take advantage of my wife being away to try a process where I poured the collodion onto the plate outside (it doesn't have to be in the dark), then sensitize the plate in my darkroom and develop it there after exposure. This keeps the level of volatile fumes (and particularly flammable materials) to a very low amount - not a permanent solution but one that let me do some playing this past weekend.

As it was a holiday weekend, I had three days to get my first "solo" experience with wet plate since taking the workshop with Joni Sternbach. I started with the smallest aluminum plates, using a modified 4X5 holder and my Shen Hao field camera. The image you see above is the second plate I produced using the camera. With this exposure as a guide, I made two additional plates using simple subjects from the garden:

Mexican planter

Studio rain chain

I was quite pleased with these plates - the collodion pour was pretty good, exposures were good and processing went well. I cleaned up, aired out the basement to push any remaining fumes away.

The next day, I continued experimenting, this time using a small studio building in the garden for setting up still life subjects. The studio had two windows and a north-facing skylight, so gets beautiful even illumination. The day was partly cloudy which made judging exposures a bit of a challenge, and I had no idea how UV-light transparent the skylight is. So there was quite a bit of guessing and experimenting going on. The first image I made using a dollar store magnifying glass as a lens - it gives an interesting effect, but I'll need to make an aperture for it to get to a reasonable exposure time (it lets in too much light for shutterless exposure).

Avocado and lemon

I then went back to the Fuji lens I was using the day before to revisit the same still life:

Avocado and lemon redux

If you click on either image to enlarge it, you'll notice the highlights are very "grainy". This puzzled me because wet plate is known for giving virtually grainless, continuous tone images. I had noticed that when I pealed back the protecting film on my aluminum plates there seemed to be a residue left behind on the surface of the plate. With subsequent plates I wiped the surface with some isopropanol to remove this residue, and the problem went away.

Black Pears I

Black Pears II

I finished my plate making with these two images of pears in a deep dish we bought years ago in Taos. Fun images to make because of the poor sensitivity of collodion to yellows, but I did feel a bit sheepish since pears seem to be one of those cliché images that get made a bit too often.

The third day I wanted to try out my Ansco 8X10 camera with a Dallmeyer Perfac brass lens. I had Niles modify two 8X10 film holders for me, one to take a 4"x5" plate. I made several plates - the first in open shade seemed somewhat underexposed, the second taken in open sunlight looked like a good exposure (exposures were quite long for an f6.3 lens, although the bellows extension contributed to that) and the third in mixed shade/direct light was overexposed:

Planter foliage

Foliage and flowers

Planters on the studio porch

Overall I was very pleased with how the weekend went. I'm already thinking of what projects I would like to pursue in wet plate, while at the same time recognizing that I have many more plates to make before I become consistently proficient with this technique. For the moment, I think I'd like to do a nice series on the garden planters we have. Each year, Elena puts together about a dozen planters in these funky, fun mexican pots and I think it would be fun to do a "formal portrait" of each planter. I also would like to explore still life some more. And I'm already feeling the excitement about taking things "on the road" to do some landscapes - for that I'll need to finish that dark box!

Monday, July 25, 2011

Weekend Kallitype Printing


Untitled kallitype print, untoned
(click on image to view larger)


first prints of the series "Richard Serra's Garden"
palladium toned kallitypes
(click on image to view larger)

I recently purchased a new UV light box so that I could make cyanotypes, kallitypes and salt prints with a known constant UV source useable all year round, day and night. Up to this point, I had been relying on the sun, which of course varies in UV strength from day to day, and is useful for probably 5 months or so per year.

Getting the new light source required some recalibration of exposure times and adjustment curves for making digital negatives. I spent last weekend working on the calibration/curve problem with only limited success, and wasn't feeling very happy about things. However, as I often say in these situations, thank goodness I'm a scientist, because I've been trained to expect and handle frustration! This weekend I was working on other things, and on Sunday afternoon decided to go back to working on the kallitypes. And finally, success! I now have a workflow that I feel confident will help me turn out kallitypes with good tonal range on a consistent basis.

The second image shows three toned kallitypes that I see as the beginning of a series "Richard Serra's Garden". I've long been a fan of the American sculptor; for me, his work in sculpture, drawing and printmaking is all about mass, volume and the way they play off each other in defining spaces. I remember when I made these images I was drawn to the rocks because their juxtapositions and mass immediately made me think of Serra's work. These prints are 4"X4" on 5"X5" paper, which I think would make an ideal size for a limited edition artist book of kallitypes. I also want to use one or more of these images in a polymer photogravure workshop I'm taking in a couple of weeks. 

Sunday, July 24, 2011

Testing Boundaries

Between waking and dreaming
(click on image to view larger)

I've been thinking recently about work that lies in the space between sharply defined artistic disciplines, particularly when photography is one of those disciplines. These recently thoughts started after I received the new book Orchard Volume 2, a collaborative effort of Ray Meeks and Wes Mills entitled "Not Seen | Not Said". The book consists of photographs taken by Meeks with the addition of tipped in drawings by Mills - this sets up an interesting dialogue between the two bodies of work, with the drawings sometimes partially obscuring the photograph underneath it, and at other times keeping a respectful distance. There is an exciting energy in this book, a catalyst of ideas for exploring the interface between drawing and photography.

When I was at Lúz Gallery last night, I saw some gorgeous prints of the work of Thomas Bartlett. Bartlett explores the world through abstractions of colour and form. Printed large and hung simply with magnets on the gallery walls, it was possible to envision the works as pastel drawings with beautiful tones and a strong sense of flow.

I like this idea of blurring the lines between photograph and drawing, and I did do a few experiments last year along these lines. Today, when I walked in the forest, I played with long exposures and then tried various of processing the images as an exercise in looking at the range of possibilities for further exploration. Here's just one example from the day's work, which I find attractive because it seems to connect to master drawings of artists like van Gogh and the pictorialist photography of Alvin Langdon Coburn.

Friday, July 22, 2011

The Unexpected Moment


Unposed Office Chair, Victoria Avenue
(click on image to view larger)

I was out this evening to hear Craig Semetko give a talk about his street photography at Lúz Gallery. The images I saw were compelling in their strong combination of geometric compositional elements as a context for people engaging in the many different actions that make us human.

Semetko approaches his street photography by constantly looking for characters with stories to tell through their actions. He talked about the contributions of design, information and emotion to making a strong image. Someone in the audience asked about how his experience of the moment transforms what might otherwise be an unremarkable snapshot into an image that pulls us in, that becomes in some way magical. Semetko shared that his strongest images are made when he is alone, and feeling lonely; this combination leads him to seek out connections to others through the making of images.

Much of street photography happens in split seconds, when a variety of human elements come together (the famous "decisive moment"). Beyond a certain element of luck, a lot depends on having a well developed eye and an instinctive sense of impending action while bringing together strong compositional elements. Semetko ascribed his own ability to do this from careful and long study of the work of the masters of street photography, particularly Henri Cartier Bresson. I found this idea really resonated with me; as I've written before an artist must go beyond knowing that they "like" or "dislike" an image. It's important to think more deeply and come to an understanding of why certain images are strong and others don't work well. In discussing his images, Semetko would point out the components that made for an effective composition, adding information on how the image developed from that point, and why the image shown succeeded for him when others he took before and after that moment did not. I learned a great deal from his presentation, even though I am not myself a street photographer. 

Craig was very open and sharing during his presentation. He had many wonderful stories to tell about his journey as a photographer and it sometimes seemed that he has lead a charmed life. He spoke about how big an influence Henri Cartier Bresson's work was for him. After making images for about six years, the first gallery show Craig was offered was a two person show - 25 of Cartier Bresson's images along with 25 of Semetko's. I think we all had goose bumps thinking about that.

As I was driving home, I came upon this scene which oddly went well with the evening. I have no idea why or how an office chair came to be in the middle of the road. But it was if I was being invited to at least tentatively dip a toe in the street photography waters. I think Craig Semetko must have arranged for this!

Friday, July 1, 2011

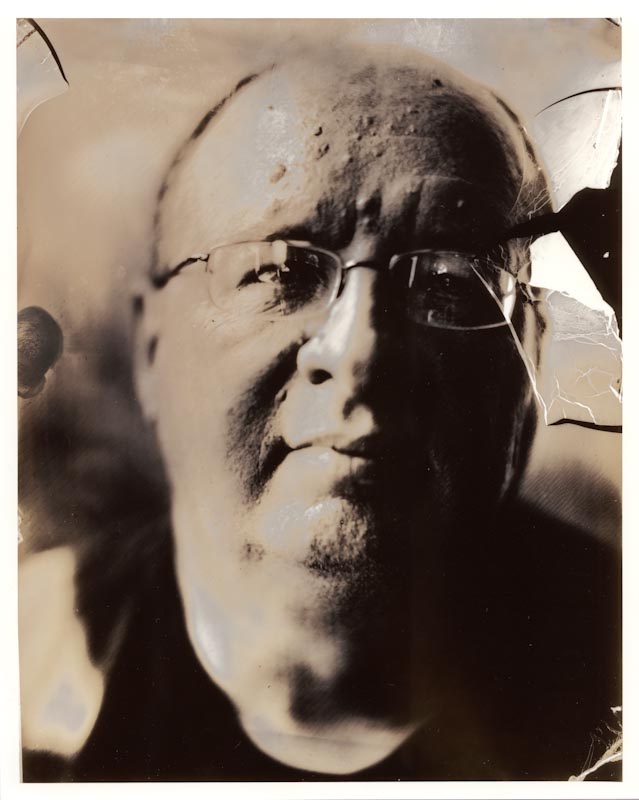
Ambrotype Prints - Channeling Chuck Close

I had the opportunity yesterday to get into the darkroom to try printing the ambrotype negative I made last weekend. I have a 4X5 enlarger, but no carrier for glass negatives. I took apart a spare 4X5 negative carrier, and used cardboard to build a glass negative tray on the top half of the carrier. It was an incredible moment when I first saw the enlarged negative, with its continuous tones.

the modified glass negative carrier

in the enlarger

the projected negative
    (click on image to view larger)

I started by making a proof print on Ilford MGIV paper, at grade 2. The print had the rich tones of the tintypes I had made, but seemed a bit cool. So I made a print on Ilford warmtone paper:

fractured self (Ilford Warmtone Paper)
(click on image to view larger)

One of the things I was interested in trying with the negative was lith printing. I started with a lith print on Fomatone MG Classic paper, which was interesting but a bit too orange in tone. I think I might investigate this paper further by following up with selenium toning to see if I can tame the colour.

fractured self (lith print on Fomatone MG Classic Paper)
(click on image to view larger)

I had made a second print on the Ilford warmtone paper with double the correct exposure so that I could try a process called "second pass lith". The idea is to overexpose the print, process normally, then bleach the print partially followed by a second development with a lith developer. I chose to use copper sulphate bleach because it can cause a split-tone or pseudo-solarization with second pass lith. I like this image, it feels as if it references the experiments of Man Ray:

fractured self, rayified (second pass lith print on Ilford Warmtone)
(click on image to view larger)

Finally, I tried a straight lith print on Kentmere Fineprint warmtone paper. I've had hit and miss results with lith printing this paper, it seems very slow to develop and doesn't always give interesting results. However, this print is for me the most successful - it has the creamy tones of a cyanide-fixed tintype combined with shadow detail that has the feel of a charcoal drawing:

fractured self (lith print on Kentmere Fineprint warmtone)
(click on image to view larger)

In future, I have a couple of other paper choices to investigate with lith printing. I'm also looking forward to printing this negative as a salt print and a kallitype. I'm excited about getting everything together to make more ambrotype negatives in my studio so that I can keep pushing this process.